Email Support
Note: We recommend using the Outlook app for iOS. To get Outlook, use your phone's camera to scan this QR code.
1. Open your iPhone or iPad's Settings.
2. Tap Mail > Accounts. (Depending on your iOS version, you might need to tap Passwords & Accounts.)
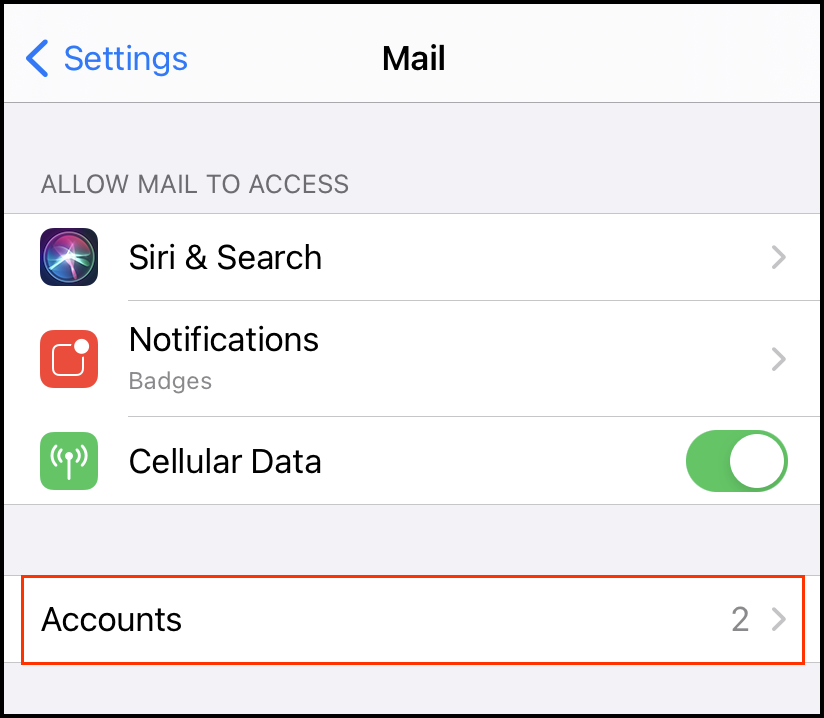
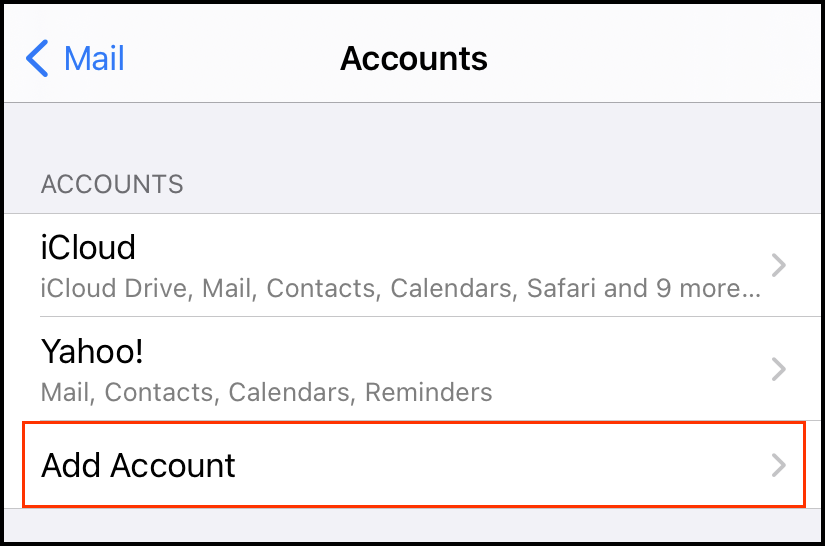
3. Tap Add Account.
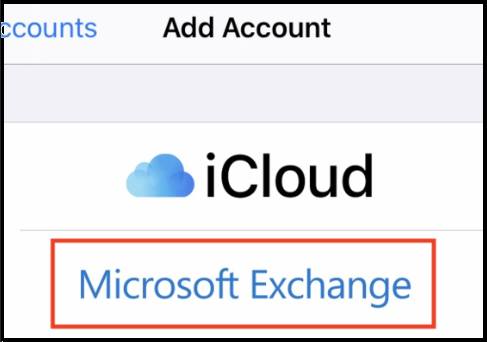
4. Tap Microsoft Exchange.
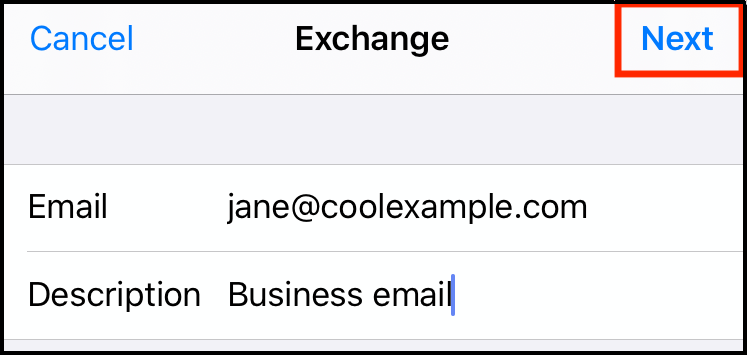
5. Enter your Email and a short Description (like your company's name or email type), and then tap Next.
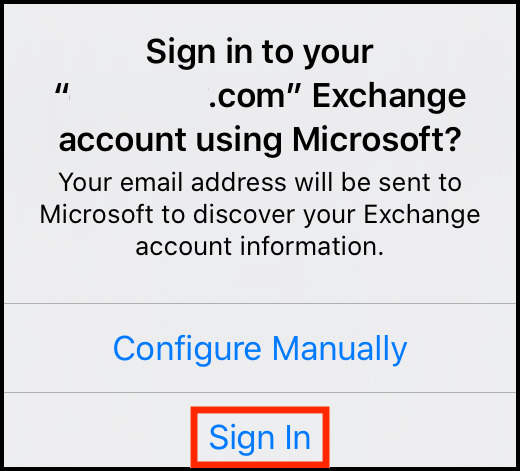
6. Tap Sign In to confirm you want to use your Microsoft Exchange account.
7. Enter your Password and tap Sign In. (You might need to choose your account type as a Work or School to continue.)

8. If your admin enabled multi-factor authentication (MFA), verify your account or set up the Authenticator app.
| Note: If Microsoft can't find your account, you might be asked to enter your details manually: • Email: Your Microsoft 365 email address • Password: Your Microsoft 365 email password • Server: outlook.office365.com (this is required) • Domain: This can be left empty • Username: Your Microsoft 365 email address |
9. Tap Next. You might be asked to select Consent on behalf of your organization. This allows Microsoft 365 and the Mail app to work together. Tap Accept.
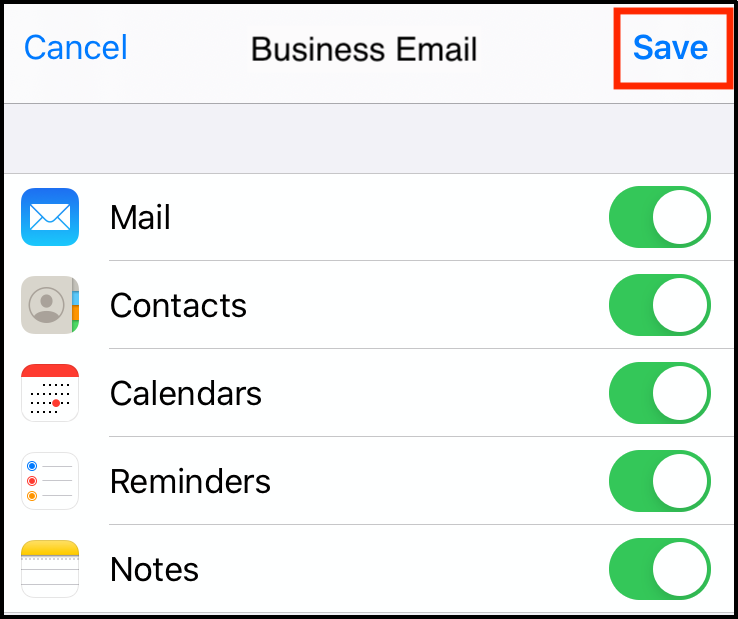
10. Tap Save. You can come back and update settings here at any point.
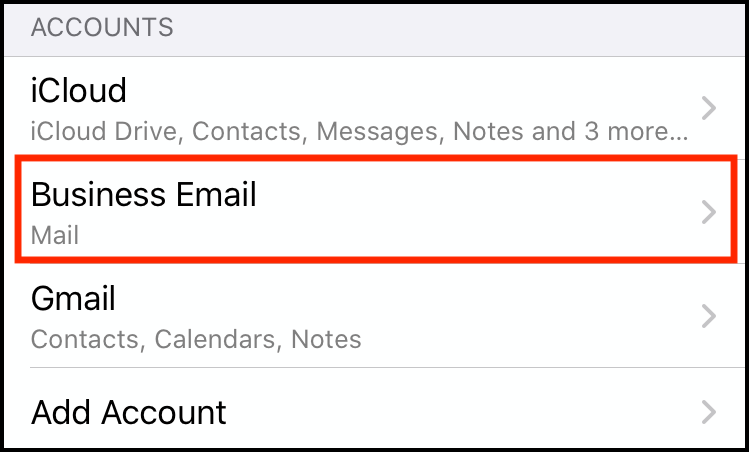
11. That's it! You'll see your Microsoft 365 account under Accounts.
1. Open Outlook. (Don't have the app? Download it at the Google Play Store.)
2. Tap Menu > then Settings.
![]()
3. Tap Add Mail Account > Add an email account.

4. Enter your Microsoft 365 email address and tap Continue.

5. Enter your Microsoft 365 password and tap Sign In. (You might need to choose your account type as Work or School.)

6. If your admin enabled multi-factor authentication (MFA), verify your account or set up the Authenticator app.
7. Your Microsoft 365 account now shows in Settings. Go to your Inbox to check your email.

1. Open Microsoft Outlook 2010. Click File, and then click Add Account.
2. At the bottom, select Manually configure server settings or additional server types, and click Next.
3. Select Internet E-mail, and click Next.
4. Enter Your Name and full E-mail Address.
5. If you have IMAP, select IMAP for your Account Type. If you're not sure, select POP3. Use these settings for your incoming and outgoing servers, depending on the type of email you have:
POP Incoming email server pop.secureserver.net SMTP (Outgoing Mail Server) smtpout.secureserver.net Enter your User Name (your full email address) and Password, and select Remember password. Click More Settings. Click the Outgoing Server tab. Select My outgoing server (SMTP) requires authentication and Use same settings as my incoming mail server. Select the Advanced tab. Next to Outgoing Server (SMTP), type 80. Then click OK. Click Next. Outlook 2010 will test your settings. When it’s done, click Close. Click Finish.